Tuesday, 22 October 2013
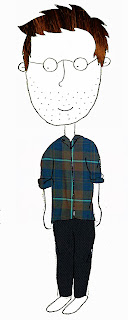
Main Character
Monday, 21 October 2013
Adding Texture to characters
After scanning in my image and opening it on photoshop the first thing I do is play around with brightness and contrast to get the lines as clear and defined as possible. I first used texture in my images when I taught myself during the last unit of level 5. The feedback I received for it was really positive so I decided to carry it through to my work in level 6.
You want to add colour to the areas where you want there to be texture. I use any colour which I can then edit or change later on the background layer.
The hair will need to have texture added to it, so I add colour by selecting the colour and the area and then simply use the paint bucket tool.
Another part I want to add texture to is my characters clothes.
Next I get a photo of the texture I want to use and open it up in photoshop
I then drag the texture onto the image that I am working on and want to add texture to. I place it where I want to add the texture and then select that I want the texture to "overlay" the colour.
Soft light and some other options work too but since it's for a young audience I like the texture to be bold and obvious and for this I find that simply overlaying the texture works best.
I then trial out colours for the different areas so that I have a few varieties to work with and choose from later.
To edit the colour I select the area that I want to work with (e.g. the shirt) from the background layer.
Finally once I am done to reduce the final file size I flatten all the layers to create one image.
Subscribe to:
Posts (Atom)


